
Live Demo:-
Add jQuery Image Zoom Effect To Your Blog
Add The Css And Scripts
Step 1. In your Blogger Dashboard Click Design > Edit HtmlStep 2. Find the following piece of code.
]]></b:skin>
Step 3. Copy And Paste The Following Code Directly Above ]]></b:skin>
#easy_zoom{
width:600px;
height:400px;
border:5px solid #eee;
background:#fff;
color:#333;
position:fixed;
top:35px;
left:50%;
overflow:hidden;
-moz-box-shadow:0 0 10px #555;
-webkit-box-shadow:0 0 10px #555;
box-shadow:0 0 10px #555;
/* vertical and horizontal alignment used for preloader text */
line-height:400px;
text-align:center;
}
Step 4. Now Find the following piece of code in your blog.width:600px;
height:400px;
border:5px solid #eee;
background:#fff;
color:#333;
position:fixed;
top:35px;
left:50%;
overflow:hidden;
-moz-box-shadow:0 0 10px #555;
-webkit-box-shadow:0 0 10px #555;
box-shadow:0 0 10px #555;
/* vertical and horizontal alignment used for preloader text */
line-height:400px;
text-align:center;
}
</head>
Step 5. Copy and paste the following piece of code Directly Above </head>Important - The code highlighted in blue is the main jQuery script, if you already have jQuery in your template. Then leave the highlighted code.
<script src="https://ajax.googleapis.com/ajax/libs/jquery/1.7.1/jquery.min.js"></script>
<script src='http://blogtipsntricks.googlecode.com/files/easyzoom.js' type='text/javascript'/><script type='text/javascript'>
jQuery(function($){
$('a.zoom').easyZoom();
});
</script>
Adding The Image To Your Posts
When you upload a large image (Don't upload image smaller than 500px) to Blogger it will often be re-sized to fit your posts.The image code you upload will look as below and you simply add class="zoom" as highlighted :
<div class="separator" style="clear: both; text-align: center;">
<a class="zoom" href="https://blogger.googleusercontent.com/img/b/R29vZ2xl/AVvXsEhS_QUSYVIATC-J-LijMpUAiXTaAaNNBF1MeI7XPwgkWrV5ALL90-pam3P3Xkm11MUqpSGVvKWD7b_gpEQGQCL0k4eu99YJWzBIA_tu1CoBjVOsvL9JteS7YJ1mbrU9T5OvIcriypXCBVc/s1600/WideScreen_Prince+of+Persia+The+Two+Thrones+03.jpg" imageanchor="1" style="margin-left: 1em; margin-right: 1em;"><img border="0" height="205" src="https://blogger.googleusercontent.com/img/b/R29vZ2xl/AVvXsEhS_QUSYVIATC-J-LijMpUAiXTaAaNNBF1MeI7XPwgkWrV5ALL90-pam3P3Xkm11MUqpSGVvKWD7b_gpEQGQCL0k4eu99YJWzBIA_tu1CoBjVOsvL9JteS7YJ1mbrU9T5OvIcriypXCBVc/s1600/WideScreen_Prince+of+Persia+The+Two+Thrones+03.jpg" width="320" /></a></div>
Now you had added the
image zoom effect to your blog.Feel free to share this post and leave
your thoughts in comments we always want to hear from you.
<a class="zoom" href="https://blogger.googleusercontent.com/img/b/R29vZ2xl/AVvXsEhS_QUSYVIATC-J-LijMpUAiXTaAaNNBF1MeI7XPwgkWrV5ALL90-pam3P3Xkm11MUqpSGVvKWD7b_gpEQGQCL0k4eu99YJWzBIA_tu1CoBjVOsvL9JteS7YJ1mbrU9T5OvIcriypXCBVc/s1600/WideScreen_Prince+of+Persia+The+Two+Thrones+03.jpg" imageanchor="1" style="margin-left: 1em; margin-right: 1em;"><img border="0" height="205" src="https://blogger.googleusercontent.com/img/b/R29vZ2xl/AVvXsEhS_QUSYVIATC-J-LijMpUAiXTaAaNNBF1MeI7XPwgkWrV5ALL90-pam3P3Xkm11MUqpSGVvKWD7b_gpEQGQCL0k4eu99YJWzBIA_tu1CoBjVOsvL9JteS7YJ1mbrU9T5OvIcriypXCBVc/s1600/WideScreen_Prince+of+Persia+The+Two+Thrones+03.jpg" width="320" /></a></div>

Pop Up Email Subscription Form For Blogger is a blogger widget using jquery. In this widget the form is created by css3 with a auto check feature and the pop up is created using jQuery. We hope this form helps you to increase your blog readers. Now we can see how to Add The Add Pop Up Email Subscription Form For Your blog.
Before that you need to see a live demo for better understanding what
we are talking about.you can see the live demo by clicking the floating
email icon on the left side of the demo page.
live demo:-Add Pop Up Email Subscription Form For Blogger
Adding jQuery plugin to the template:
As this widget based on jQuery plugin, First you need to have a jQuery Plugin in your Blog template.This Step is Required, If your Blog already have this plugin then Ignore this Step.
If your Blog Don’t have this Plugin, Install the jQuery Plugin.
- Add the below line of code before
</head>tag.
<script src="https://ajax.googleapis.com/ajax/libs/jquery/1.7.1/jquery.min.js"></script>
Adding Widget Code to blogger
These steps are to add the Pop Up Email Subscription widget to your blog.- Go to Layout >> Add A Gadget, then choose HTML/JavaScript
- Paste this code inside it.
<style type="text/css">
#subscribe-button { float: left; position: fixed; bottom: 5%; left: 0; z-index: 999; }
#subscribe-widget { display:none; }
/* Overlay */
#btnt-overlay { background-color:#000; }
/* Container */
#btnt-container { min-height:350px; min-width:500px; color:#222; background-color:#fff; border:4px solid #ddd; }
#btnt-container .btnt-data { padding:8px; }
#btnt-container a.btntCloseImg { background:url(http://3.bp.blogspot.com/-1lucxKhy3Zs/T3vIg4k-5wI/AAAAAAAAArM/EiH85Hp-ZW8/s1600/x.png) no-repeat; width:25px; height:29px; display:inline; z-index:3200; position:absolute; top:-15px; right:-16px; cursor:pointer; }
#description { color: #AAAAAA; font-family: times New Roman; font-size: 25px; font-style: italic; }
#description img { float: left; height: 80px; padding: 0 25px 0 10px; width: 80px; }
#btntfollowForm { padding: 15px; }
#btntfollowForm p { margin: 0 0 10px; }
#btntfollowForm input:not([type="checkbox"]){ width: 93%; margin-top: 4px; margin-bottom: 20px; padding: 10px 5px 10px 25px; border: 1px solid rgb(178, 178, 178); -webkit-appearance: textfield; -webkit-box-sizing: content-box; -moz-box-sizing : content-box; box-sizing : content-box; -webkit-border-radius: 3px; -moz-border-radius: 3px; border-radius: 3px; -webkit-box-shadow: 0px 1px 4px 0px rgba(168, 168, 168, 0.6) inset; -moz-box-shadow: 0px 1px 4px 0px rgba(168, 168, 168, 0.6) inset; box-shadow: 0px 1px 4px 0px rgba(168, 168, 168, 0.6) inset; -webkit-transition: all 0.2s linear; -moz-transition: all 0.2s linear; -o-transition: all 0.2s linear; transition: all 0.2s linear; }
#btntfollowForm input:not([type="checkbox"]):active,
#btntfollowForm input:not([type="checkbox"]):focus{ border: 1px solid rgba(91, 90, 90, 0.7); background: rgba(238, 236, 240, 0.2); -webkit-box-shadow: 0px 1px 4px 0px rgba(168, 168, 168, 0.9) inset; -moz-box-shadow: 0px 1px 4px 0px rgba(168, 168, 168, 0.9) inset; box-shadow: 0px 1px 4px 0px rgba(168, 168, 168, 0.9) inset; }
#btntfollowForm .button input{ background: none repeat scroll 0 0 #3D9DB3; border: 1px solid #1C6C7A; border-radius: 3px 3px 3px 3px; box-shadow: 0 1px 6px 4px rgba(0, 0, 0, 0.07) inset, 0 0 0 3px #FEFEFE, 0 5px 3px 3px #D2D2D2; color: #FFFFFF; cursor: pointer; font-family: 'Arial Narrow',Arial,sans-serif; font-size: 24px; margin-bottom: 10px; padding: 8px 5px; text-shadow: 0 1px 1px rgba(0, 0, 0, 0.5); width: 30%; float: right; }
#btntfollowForm .button input:hover{ background: #4ab3c6; text-decoration: none; }
#btntfollowForm .button input:active,
#btntfollowForm .button input:focus{ background: rgb(40, 137, 154); position: relative; top: 1px; border: 1px solid rgb(12, 76, 87); -webkit-box-shadow: 0px 1px 6px 4px rgba(0, 0, 0, 0.2) inset; -moz-box-shadow: 0px 1px 6px 4px rgba(0, 0, 0, 0.2) inset; box-shadow: 0px 1px 6px 4px rgba(0, 0, 0, 0.2) inset; }
.btntFollowFooter { text-align: center; font: 10px Tahoma, Helvetica, Arial, Sans-Serif; padding: 7px 0; margin-top: 80px; text-shadow: 0px 2px 3px #555; position: absolute; width: 500px; }
.btntFollowFooter a { color: #222; text-decoration: none; }
.btntFollowFooter a:hover { color: #fff; }
<!--[if lt IE 7]>
#btnt-container a.btntCloseImg { background:none; right:-14px; width:22px; height:26px; filter:progid:DXImageTransform.Microsoft.AlphaImageLoader(src='http://3.bp.blogspot.com/-1lucxKhy3Zs/T3vIg4k-5wI/AAAAAAAAArM/EiH85Hp-ZW8/s1600/x.png',sizingMethod='scale'); }
#btntfollowForm input{ padding: 10px 5px 10px 32px; width: 93%; }
#btntfollowForm input[type=checkbox]{ width: 10px; padding: 0; }
<![endif]-->
</style>
<div id="subscribe-button">
<a class="subscribe" href="#"><img src="http://2.bp.blogspot.com/-NASh-8VP8qs/T32ePzbJtSI/AAAAAAAAAr8/wjiJnIb7GD4/s1600/subscribe_to_email.png" alt="subscribe" /></a></div>
<div id="subscribe-widget">
<div id="btntfollowForm">
<img alt="Subscribe" border="0" float="center" src="http://1.bp.blogspot.com/-WcR7_thytsA/T3xAvSp4RBI/AAAAAAAAArc/zIO8zUiOOT0/s1600/subscribeviaemail.PNG" />
<div id='description'>
<img alt="email" border="0" src="http://4.bp.blogspot.com/-RKkfCfOLNx8/T3wPtkmqYuI/AAAAAAAAArU/gGpb8_Hep70/s1600/email-icon.PNG" />Subscribe to our mailing list to get the updates to your email inbox...</div>
<form action="http://feedburner.google.com/fb/a/mailverify" method="post" onsubmit="window.open('http://feedburner.google.com/fb/a/mailverify?uri=chandeepsblogtips', 'popupwindow', 'scrollbars=yes,width=550,height=520');return true" target="popupwindow">
<input name="email" placeholder="Enter Your Email..." required="required" type="text" /><input name="uri" type="hidden" value="chandeepsblogtips" /><input name="loc" type="hidden" value="en_US" />
<div class="button">
<input type="submit" value="Subscribe" /></div>
</form>
</div>
<div class="btntFollowFooter">
Delivered by <a href="http://feedburner.google.com/" target="_blank">FeedBurner</a> | powered by <a href="http://www.blogtipsntricks.com/" rel="dofollow" target="_blank">blogtipsntricks</a></div>
</div>
<script src="https://blogtipsntricks.googlecode.com/files/jquery.btnt.popup.js" type="text/javascript">
</script>
<script type="text/javascript">
jQuery(function ($) {
// Load dialog on page load
//$('#subscribe-widget').modal();
// Load dialog on click
$('#subscribe-button .subscribe').click(function (e) {
$('#subscribe-widget').modal();
return false;
});
});
</script> - Replace the code highlighted above with your feedburner username .
The username for your feed can be found at the end of your feed URL.For example our feedburner URL is http://feeds.feedburner.com/chandeepsblogtips , with chandeepsblogtips as the username.
- Now save the widget and view your blog. The widget trigger icon is placed in the left side of your blog.

live demo:-
Add One Time Popup Email Subscription Widget
Adding jQuery plugin to the template:
As this widget based on jQuery plugin, First you need to have a jQuery Plugin in your Blog template.Ignore this Step, If your Blog already have a jQuery plugin.
- Add the below line of code before
</head>tag.
<script src="https://ajax.googleapis.com/ajax/libs/jquery/1.7.1/jquery.min.js"></script>
Adding Widget Code to blogger
These steps are to add the One Time Popup Email Subscription widget to your blog.- Go to Layout >> Add A Gadget, then choose HTML/JavaScript
- Paste this code inside it.
<style>
#backgroundPopup{ display:none; position:fixed; _position:absolute; /* hack for internet explorer 6*/ height:100%; width:100%; top:0; left:0; background-color: transparent; background:rgba(0, 0, 0, 0.5);z-index:999; }
#popupContact{ display:none; position:fixed; _position:absolute; /* hack for internet explorer 6*/ height:350px; width:500px; background:#FFFFFF; border:4px solid #ddd; z-index:999; padding:8px; font-size:13px; }
#popupContactClose{ background:url(http://3.bp.blogspot.com/-1lucxKhy3Zs/T3vIg4k-5wI/AAAAAAAAArM/EiH85Hp-ZW8/s1600/x.png) no-repeat; width:25px; height:29px; display:inline; z-index:3200; position:absolute; top:-15px; right:-16px; cursor:pointer; text-indent: -99999px;}
#description { color: #AAAAAA; font-family: times New Roman; font-size: 25px; font-style: italic; line-height:30px; }
#description img { float: left; height: 80px; padding: 0 25px 0 10px; width: 80px; }
#btntfollowForm { padding: 15px; }
#btntfollowForm img { border:none; }
#btntfollowForm p { margin: 0 0 10px;}
#btntfollowForm input:not([type="checkbox"]){ width: 93%; margin-top: 10px; margin-bottom: 20px; padding: 10px 5px 10px 25px; border: 1px solid rgb(178, 178, 178); -webkit-appearance: textfield; -webkit-box-sizing: content-box; -moz-box-sizing : content-box; box-sizing : content-box; -webkit-border-radius: 3px; -moz-border-radius: 3px; border-radius: 3px; -webkit-box-shadow: 0px 1px 4px 0px rgba(168, 168, 168, 0.6) inset; -moz-box-shadow: 0px 1px 4px 0px rgba(168, 168, 168, 0.6) inset; box-shadow: 0px 1px 4px 0px rgba(168, 168, 168, 0.6) inset; -webkit-transition: all 0.2s linear; -moz-transition: all 0.2s linear; -o-transition: all 0.2s linear; transition: all 0.2s linear; }
#btntfollowForm input:not([type="checkbox"]):active,
#btntfollowForm input:not([type="checkbox"]):focus{ border: 1px solid rgba(91, 90, 90, 0.7); background: rgba(238, 236, 240, 0.2); -webkit-box-shadow: 0px 1px 4px 0px rgba(168, 168, 168, 0.9) inset; -moz-box-shadow: 0px 1px 4px 0px rgba(168, 168, 168, 0.9) inset; box-shadow: 0px 1px 4px 0px rgba(168, 168, 168, 0.9) inset;}
#btntfollowForm .button input{ background: none repeat scroll 0 0 #3D9DB3; border: 1px solid #1C6C7A; border-radius: 3px 3px 3px 3px; box-shadow: 0 1px 6px 4px rgba(0, 0, 0, 0.07) inset, 0 0 0 3px #FEFEFE, 0 5px 3px 3px #D2D2D2; color: #FFFFFF; cursor: pointer; font-family: 'Arial Narrow',Arial,sans-serif; font-size: 24px; margin-bottom: 10px; padding: 8px 5px; text-shadow: 0 1px 1px rgba(0, 0, 0, 0.5); width: 30%; float: right; }
#btntfollowForm .button input:hover{ background: #4ab3c6; text-decoration: none; }
#btntfollowForm .button input:active,
#btntfollowForm .button input:focus{ background: rgb(40, 137, 154); position: relative; top: 1px; border: 1px solid rgb(12, 76, 87); -webkit-box-shadow: 0px 1px 6px 4px rgba(0, 0, 0, 0.2) inset; -moz-box-shadow: 0px 1px 6px 4px rgba(0, 0, 0, 0.2) inset; box-shadow: 0px 1px 6px 4px rgba(0, 0, 0, 0.2) inset; }
.btntFollowFooter { color:#222; text-align: center; font: 10px Tahoma, Helvetica, Arial, Sans-Serif; padding: 7px 0; margin-top: 80px; text-shadow: 0px 2px 3px #555; position: absolute; width: 500px; }
.btntFollowFooter a { color: #222; text-decoration: none; }
.btntFollowFooter a:hover { color: #fff; }
<!--[if lt IE 7]>
#btnt-container a.btntCloseImg { background:none; right:-14px; width:22px; height:26px; filter:progid:DXImageTransform.Microsoft.AlphaImageLoader(src='http://3.bp.blogspot.com/-1lucxKhy3Zs/T3vIg4k-5wI/AAAAAAAAArM/EiH85Hp-ZW8/s1600/x.png',sizingMethod='scale'); }
#btntfollowForm input{ padding: 10px 5px 10px 32px; width: 93%; }
#btntfollowForm input[type=checkbox]{ width: 10px; padding: 0;}
<![endif]-->
</style>
<div id="backgroundPopup">
<div id="popupContact">
<a href="" id="popupContactClose">x</a>
<div id="btntfollowForm">
<img alt="Subscribe" border="0" float="center" src="http://1.bp.blogspot.com/-WcR7_thytsA/T3xAvSp4RBI/AAAAAAAAArc/zIO8zUiOOT0/s1600/subscribeviaemail.PNG" />
<div id="description">
<img alt="email" border="0" src="http://4.bp.blogspot.com/-RKkfCfOLNx8/T3wPtkmqYuI/AAAAAAAAArU/gGpb8_Hep70/s1600/email-icon.PNG" />Subscribe to our mailing list to get the updates to your email inbox...</div>
<form action="http://feedburner.google.com/fb/a/mailverify" method="post" onsubmit="window.open('http://feedburner.google.com/fb/a/mailverify?uri=chandeepsblogtips', 'popupwindow', 'scrollbars=yes,width=550,height=520');return true" target="popupwindow">
<input name="email" placeholder="Enter Your Email..." required="required" type="text" /><input name="uri" type="hidden" value="chandeepsblogtips" /><input name="loc" type="hidden" value="en_US" />
<div class="button">
<input type="submit" value="Subscribe" /></div>
</form>
</div>
<div class="btntFollowFooter">
Delivered by <a href="http://feedburner.google.com/" target="_blank">FeedBurner</a> | powered by <a href="http://www.blogtipsntricks.com/" rel="dofollow" target="_blank">blogtipsntricks</a></div>
</div>
</div>
<script src="http://yourjavascript.com/24315621361/jquery.cookie.js" type="text/javascript">
</script>
<script type="text/javascript">
var popupStatus = 0;
//this code will load popup with jQuery magic!
function loadPopup(){
//loads popup only if it is disabled
if(popupStatus==0){
$("#backgroundPopup").fadeIn("slow");
$("#popupContact").fadeIn("slow");
popupStatus = 1;
}
}
//This code will disable popup when click on x!
function disablePopup(){
//disables popup only if it is enabled
if(popupStatus==1){
$("#backgroundPopup").fadeOut("slow");
$("#popupContact").fadeOut("slow");
popupStatus = 0;
}
}
//this code will center popup
function centerPopup(){
//request data for centering
var windowWidth = document.documentElement.clientWidth;
var windowHeight = document.documentElement.clientHeight;
var popupHeight = $("#popupContact").height();
var popupWidth = $("#popupContact").width();
//centering
$("#popupContact").css({
"position": "absolute",
"top": windowHeight/2-popupHeight/2,
"left": windowWidth/2-popupWidth/2
});
//only need force for IE6
$("#backgroundPopup").css({
"height": windowHeight
});
}
//CONTROLLING EVENTS IN jQuery
$(document).ready(function(){
if ($.cookie("anewsletter") != 1) {
//centering with css
centerPopup();
//load popup
loadPopup();
}
//CLOSING POPUP
//Click the x event!
$("#popupContactClose").click(function(){
disablePopup();
$.cookie("anewsletter", "1", { expires: 7 });
});
//Press Escape event!
$(document).keypress(function(e){
if(e.keyCode==27 && popupStatus==1){
disablePopup();
$.cookie("anewsletter", "1", { expires: 7 });
}
});
});
</script> - Replace the code highlighted above with your feedburner username.
The username for your feed can be found at the end of your feed URL.For example our feedburner URL is http://feeds.feedburner.com/chandeepsblogtips , with chandeepsblogtips as the username. - Now save the widget and view your blog.
I hope you enjoyed this widget. Please share your views about the widget via comments!!! We love to here from you.

- This widget only works When you have more then 200 comments in your Blog Posts.
- This widget is not works for Threaded Comments. As threaded comment system Loads old comments with the help of AJAX.
Preview

How to Integrate Comments Page Navigation Widget in Blogger ?
- Go to New Blogger Dashboard > Click the More Options drop-down and Select the Template
- Click on Edit HTML button and Click on Proceed button
- Check Expand Widget Templates checkbox
- Search for the below line of code
<b:includable id='comments' var='post'> - Place the Below Code after it!
<b:if cond='data:post.commentPagingRequired'> <script type='text/javascript'> var w2bTotalComments = <data:post.numComments/>; var w2bPrevBtnText = "Prev"; var w2bNextBtnText = "Next"; </script> <script type="text/javascript" src="http://bloggerblogwidgets.googlecode.com/svn/trunk/w2b_commentspagination.js"></script> </b:if> - Save the Template
var w2bPrevBtnText = "Prev"; Previous Button link textvar w2bNextBtnText = "Next"; Next Button link textAdding Styles
This Pagination widget comes with two Different Styles.Add the any One style code Before
]]></b:skin> tagDefault Style Preview

.w2bCommentsPaging{
 font-size:13px;
 display: block;
}
.commPageOf{
 padding:4px 8px;
 margin-right:6px;
}
.commPrev a,.commNext a,.commentNum a {
 text-decoration: none;
 border: 1px solid #ddd;
 background: #efefef;
 padding: 4px 8px;
 margin: 0 4px;
 text-decoration: none;
 color: #666;
 -webkit-border-radius: 2px;
 -moz-border-radius: 2px;
 border-radius: 2px;
}

.commPrev a:hover, .commNext a:hover, .commentNum a:hover, .commentNum.commCurrent a{
 border:1px solid #CDCDCD;
 background:#ddd;
 color: #222;
}
.paging-control-container {
 clear: both;
 display: block;
 float: none;
 font-size: 80%;
 margin: 10px 0;
 overflow: hidden;
 padding: 10px 0;
 text-align: right;
}
Dark Style Preview

.w2bCommentsPaging{
 font-size:12px;
 display: block;
}
.commPageOf{
 padding:5px 10px;
 margin-right:6px;
}
.commPrev a,.commNext a,.commentNum a {
 text-decoration:none;
 background: #4E4E4E;
 padding: 5px 10px;
 margin: 0 4px;
 text-decoration: none;
 color: #FFF;
 -webkit-border-radius: 3px;
 -moz-border-radius: 3px;
 border-radius: 3px;
}

.commPrev a:hover, .commNext a:hover, .commentNum a:hover, .commentNum.commCurrent a{
 background:#8956B8;
 color:#fff;
}
.paging-control-container {
 clear: both;
 display: block;
 float: none;
 font-size: 80%;
 margin: 10px 0;
 overflow: hidden;
 padding: 10px 0;
 text-align: right;
}

Below I’ll show you how to add this Cool Floating Recent Tweets Widget In Blogger and WordPress.
Live Demo
Adding Cool Floating Floating Recent Tweets Widget.
Adding Recent Tweets Widget To Blogger- Go to Dashboard > Design > Page Elements.
- Click Add A Gadget. In window, select HTML/Javascript .
- Copy the code below and paste it inside the box.
- Click Save button.
- Go to Dashboard > Appearance > Widgets > Available Widgets.
- Drag Text widget into a sidebar.
- Paste in the code.
- Save.
<style>img,a{border:0;}#on{visibility:visible;}#off{visibility:hidden;}#facebook_div{width:196px;height:353px;overflow:hidden;}#twitter_div{width:246px;height:353px;overflow:hidden;}#google_plus_div{width:152px;height:97px;overflow:hidden;margin-left:50px;margin-top:10px;}#knfeedburner_div{width:300px;height:97px;margin-top:25px;overflow:hidden;}#kakinetwork_div{width:300px;height:97px;overflow:hidden;}

#twitter_right{z-index:10004;border:2px solid #6CC5FF;background-color:#6CC5FF;width:246px;height:353px;position:fixed;right:-250px;}#twitter_right_img{position:absolute;top:-2px;left:-35px;border:0;}

#kakinetwork_right{z-index:10003;border:2px solid #303030;background-color:#fff;width:300px;height:97px;position:fixed;}#kakinetwork_right img{position:absolute;top:-2px;left:-101px;}/* left side style */#facebook_left{z-index:10005;border:2px solid #3c95d9;background-color:#fff;width:196px;height:353px;position:fixed;left:-200px;}#facebook_left img{position:absolute;top:-2px;right:-35px;}#facebook_left iframe{border:0px solid #3c95d9;overflow:hidden;position:static;height:360px;right:-2px;top:-3px;}#twitter_left{z-index:10004;border:2px solid #6CC5FF;background-color:#6CC5FF;width:246px;height:353px;position:fixed;left:-250px;}#twitter_left_img{position:absolute;top:-2px;right:-35px;border:0;}
#kakinetwork_left{z-index:10003;border:2px solid #303030;background-
color:#fff;width:300px;height:97px;position:fixed;}#kakinetwork_left img{position:absolute;top:-2px;right:-101px;}

</style><script src='http://ajax.googleapis.com/ajax/libs/jquery/1.7.1/jquery.min.js'></script><script type="text/javascript" src="http://apis.google.com/js/plusone.js"></script><script type="text/javascript">jQuery(document).ready(function(){ jQuery("#facebook_right").hover(function(){ jQuery(this).stop(true,false).animate({right:  0}, 500); },function(){ jQuery("#facebook_right").stop(true,false).animate({right: -200}, 500); });    jQuery("#twitter_right").hover(function(){ jQuery(this).stop(true,false).animate({right:  0}, 500); },function(){ jQuery("#twitter_right").stop(true,false).animate({right: -250}, 500); });     jQuery("#google_plus_right").hover(function(){ jQuery(this).stop(true,false).animate({right:  0}, 500); },function(){ jQuery("#google_plus_right").stop(true,false).animate({right: -154}, 500); });    jQuery("#feedburner_right").hover(function(){ jQuery(this).stop(true,false).animate({right:  0}, 500); },function(){ jQuery("#feedburner_right").stop(true,false).animate({right: -303}, 500); });    });</script>

<div id="on"><div id="twitter_right" style="top: 20%;"><div id="twitter_div"><img id="twitter_right_img" src="https://blogger.googleusercontent.com/img/b/R29vZ2xl/AVvXsEj_ZS71ywZo84PZAdaU_ljezdbngpOhbe0VLj3WHTVNaSCWaKxKXPwi4WvXKgXyFbbEt99h-QPLzZYzF8GhBF6OWetRwqS9zHcns4myfHTQuvk9lEZBD1p6U0gOCTtab-CzMhpFcYKQTzA/s320/allbloggingtips.com-twitter-icon.png" /><script src="http://widgets.twimg.com/j/2/widget.js"></script><script>new TWTR.Widget({version: 2,type: 'profile',rpp: 4,interval: 1000,width: 246,height: 260,theme: {shell: {background: '#63BEFD',color: '#FFFFFF'},tweets: {background: '#FFFFFF',color: '#000000',links: '#47a61e'}},features: { loop: false,live: true,scrollbar: false,hashtags: false,timestamp: true,avatars: true,behavior: 'all' }}).render().setUser('allbloggingtips').start();</script></div></div></div>

</div>
Just replace allbloggingtips with your twitter username. That’s it! 
Visit your Blogs to see it floating at the right side of your webpage. I hope this Floating Recent Tweets Widget will help you in increasing the number of your Twitter Followers. That’s all. If you face any problem in Floating Floating Recent Tweets Widget then don’t stop just drop your comments and Feel free to ask.
In this tutorial , im going to to explain How
to add Rss feed subscription box below your
ever post.Rss helps you to get more traffic
to your blog.Most of website owners use this
Every post updates sending to rss subscribers
email. This is easy to add, follow these steps.
Check my earlier Rss subscribe box here

Demo
1. Log in to blogger account and Click drop down.
 2. Now select "Template" Like Below.

3. Now you can see Live on blog, Click EDIT HTML Button"
4. Now click Proceed button.
5. Put checked marked in Expand Widget Templates
6. Find this tag by using Ctrl+F </head>
7. Paste below code Before </head> tag
8. again Find this tag by using Ctrl+F <data:post.body/>
9. Paste below code after <data:post.body/> tag
Replace selected names with your uersnames
10. Now save your template.
You are done...
to add Rss feed subscription box below your
ever post.Rss helps you to get more traffic
to your blog.Most of website owners use this
Every post updates sending to rss subscribers
email. This is easy to add, follow these steps.
Check my earlier Rss subscribe box here
Demo
1. Log in to blogger account and Click drop down.
3. Now you can see Live on blog, Click EDIT HTML Button"
4. Now click Proceed button.
5. Put checked marked in Expand Widget Templates
6. Find this tag by using Ctrl+F </head>
7. Paste below code Before </head> tag
<style type='text/css'> .sub-box{ width: 600px; background: #fff; padding: 2px 5px 7px 7px; border: 2px solid #000; border-radius: 15px; } .sub-box:hover{ border:2px solid #511111; } .followlinks h1{ font-family:Cabin Condensed; font-weight: bold; color: #000; padding: 0px 0px 2px 40px;; font-size:17px; } .followlinks ul{ font-family:Cabin Condensed; font-weight: bold;} .followlinks ul li{ float:left; width:90px; padding-left:40px; margin:0 0 0 5px !important; line-height:35px !important;} .followlinks ul li a{ font-size:20px !important; text-decoration:none; font-weight:normal;} .followlinks ul li.otrss{ background:url(http://3.bp.blogspot.com/-CMD8tTcyanA/UGEoXF32zpI/AAAAAAAAEQM/E1OgMW6SZvc/s1600/bloggertrix-rss-icon.png) no-repeat scroll left center transparent; } .followlinks ul li.otgoogleplus{ background:url(http://2.bp.blogspot.com/-lhm8DqIzDpI/UGEoWe4xv9I/AAAAAAAAEQA/a850kufuzxw/s1600/bloggertrix-google-icon.png) no-repeat scroll left center transparent; } .followlinks ul li.ottwitter{ background:url(http://1.bp.blogspot.com/-cDAZzZi29P0/UGEoYMJQYrI/AAAAAAAAEQQ/otQiWtPk-mc/s1600/bloggertrix-twitter-icon.png) no-repeat scroll left center transparent; } .followlinks ul li.otfacebook{ background:url(http://1.bp.blogspot.com/-8FUcdaI0SwQ/UGEoVTiWRWI/AAAAAAAAEP8/NN3_sprT6Xo/s1600/bloggertrix-facebook-icon.png) no-repeat scroll left center transparent; } form.emailform{ margin:5px 0 0; display:block; clear:both; } .emailtext{ background:url(http://4.bp.blogspot.com/-DMrSxx8BJqo/TteQx1ijO2I/AAAAAAAABF0/Qd1ROb_8oeA/s1600/ot-mail.png) no-repeat scroll 4px center transparent; padding:7px 15px 7px 35px; color:#444; font-weight:bold; text-decoration:none; border:1px solid #D3D3D3; -moz-border-radius: 4px; -webkit-border-radius: 4px; border-radius: 4px; -moz-box-shadow: 1px 1px 2px #CCC inset; -webkit-box-shadow: 1px 1px 2px #CCC inset; box-shadow: 1px 1px 2px #CCC inset; width: 550px; } .emailtext:focus{ outline: none; } .sub-button{ color:#444; font-weight:bold; text-decoration:none; padding:6px 10px; border:1px solid #D3D3D3; cursor: pointer; -moz-border-radius: 5px; -webkit-border-radius: 5px; -goog-ms-border-radius: 5px; border-radius: 5px; background: #fbfbfb; background: -moz-linear-gradient(top, #fbfbfb 0%, #f4f4f4 100%); background: -webkit-gradient(linear, left top, left bottom, color-stop(0%,#fbfbfb), color-stop(100%,#f4f4f4)); background: -webkit-linear-gradient(top, #fbfbfb 0%,#f4f4f4 100%); background: -o-linear-gradient(top, #fbfbfb 0%,#f4f4f4 100%); background: -ms-linear-gradient(top, #fbfbfb 0%,#f4f4f4 100%); filter: progid:DXImageTransform.Microsoft.gradient( startColorstr='#FBFBFB', endColorstr='#F4F4F4',GradientType=0 ); background: linear-gradient(top, #fbfbfb 0%,#f4f4f4 100%); } .sub-button:hover{ background: -moz-linear-gradient(top, #e7e7e7 0%, #f4f4f4 100%); background: -webkit-gradient(linear, left top, left bottom, color-stop(0%,#e7e7e7), color-stop(100%,#f4f4f4)); background: -webkit-linear-gradient(top, #e7e7e7 0%,#f4f4f4 100%); background: -o-linear-gradient(top, #e7e7e7 0%,#f4f4f4 100%); background: -ms-linear-gradient(top, #e7e7e7 0%,#f4f4f4 100%); filter: progid:DXImageTransform.Microsoft.gradient( startColorstr='#e7e7e7', endColorstr='#F4F4F4',GradientType=0 ); background: linear-gradient(top, #e7e7e7 0%,#f4f4f4 100%); }</style> <script type='text/javascript'> WebFontConfig = { google: { families: [ 'Cabin+Condensed::latin' ] } }; (function() { var wf = document.createElement('script'); wf.src = ('https:' == document.location.protocol ? 'https' : 'http') + '://ajax.googleapis.com/ajax/libs/webfont/1/webfont.js'; wf.type = 'text/javascript'; wf.async = 'true'; var s = document.getElementsByTagName('script')[0]; s.parentNode.insertBefore(wf, s); })(); </script>
8. again Find this tag by using Ctrl+F <data:post.body/>
9. Paste below code after <data:post.body/> tag
<div class='sub-box'> <div class='followlinks'> <h1>Get Free Email Updates and Like us on your Social networking site</h1> <ul> <li class='otrss'><a href='http://feeds.feedburner.com/Bloggertrix' target='_blank'>RSS</a></li> <li class='otgoogleplus'><a href='http://plus.google.com/107955298793879607964' target='_blank'>Google+</a></li> <li class='ottwitter'><a href='http://twitter.com/bloggertrix' target='_blank'>Twitter</a></li> <li class='otfacebook'><a href='https://www.facebook.com/bloggertrix' target='_blank'>Facebook</a></li> </ul> </div> <br/> <div style='text-align: left; display: inline-block;'> <form action='http://feedburner.google.com/fb/a/mailverify' class='emailform' method='post' onsubmit='window.open('http://feedburner.google.com/fb/a/mailverify?uri=Everfreetech', 'popupwindow', 'scrollbars=yes,width=550,height=520');return true' target='popupwindow'> <input name='uri' type='hidden' value='blogggertrix'/> <input name='loc' type='hidden' value='en_US'/> <input class='emailtext' name='email' onblur='if (this.value == "") {this.value = "Enter your email...";}' onfocus='if (this.value == "Enter your email...") {this.value = ""}' type='text' value='Enter your email...'/> <input alt='' class='sub-button' title='' type='submit' value='SignUp'/> </form></div></div>
Replace selected names with your uersnames
10. Now save your template.
You are done...
Social bookmarking is really important in
blogger.Between social site,Facebook, Google+
and twitter are more popular.because we are
creating fan page and follower for our blog.
Actually, its the one of way to get traffic.
Today im going to explain,how to add scrolling
recommendation box for your blog.check
demo link below. you will get it when
scrolling to bottom.
Demo
1. Log in to blogger account and Click drop down.
2. Now select "Template" Like Below.
3. Now you can see Live on blog, Click EDIT HTML Button"
4. Now click Proceed button.
5.Find this code by using Ctrl+F ]]></b:skin>
6. Paste below code Before ]]></b:skin> code
7. Go to blogger and click drop-down like 1st step and select Layout
8. Click Add Gadget and select 'HTML/Javascript"
9. Paste below code.
10. Now save your template. You are done.
blogger.Between social site,Facebook, Google+
and twitter are more popular.because we are
creating fan page and follower for our blog.
Actually, its the one of way to get traffic.
Today im going to explain,how to add scrolling
recommendation box for your blog.check
demo link below. you will get it when
scrolling to bottom.

Demo
3. Now you can see Live on blog, Click EDIT HTML Button"
4. Now click Proceed button.
5.Find this code by using Ctrl+F ]]></b:skin>
6. Paste below code Before ]]></b:skin> code
#socialslide{background:#f3f3f3;border-radius:9px;
-moz-border-radius:9px;-webkit-border-radius:9px;-moz-box-shadow:inset 0 0 3px #333;
-webkit-box-shadow:inset 0 0 3px #333;box-shadow:inner 0 0 3px #333;
padding:12px 14px 12px 14px;width:300px;position:fixed;bottom:13px;
right:2px;display:none;z-index:3;height:65px;}
7. Go to blogger and click drop-down like 1st step and select Layout
8. Click Add Gadget and select 'HTML/Javascript"
9. Paste below code.
<script type="text/javascript" src="http://ajax.googleapis.com/ajax/libs/jquery/1.4.4/jquery.min.js"></script>
<script type="text/javascript">$(window).scroll(function(){if($(document).scrollTop()>=$(document).height()/4)$("#socialslide").show("slow");else $("#socialslide").hide("slow");});function closesocialslide(){$('#msocialslide').remove();$.ajax({type:"POST",url:"/facebookpage.php"});}</script>
<div style="display: none;" id="socialslide">
<a style="position:absolute;top:14px;right:10px;color:#555;font-size:10px;font-weight:bold;" href="javascript:void(0);" onclick="return closesocialslide();">(X)</a>
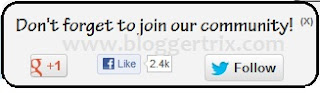
<span style="font-family: Tekton Pro; font-size: 20px; margin: 10px 0; text-shadow: 1px 1px 0 #FFFFFF;">Don't forget to join our community!</span><br />
<div style="float:left; margin:15px;"><g:plusone annotation="none"></g:plusone></div>
<div style="float:left; margin:15px;"><iframe src="//www.facebook.com/plugins/like.php?href=https%3A%2F%2Fwww.facebook.com%2Fbloggertrix&send=false&layout=button_count&width=80&show_faces=false&action=like&colorscheme=light&font=arial&height=21" scrolling="no" frameborder="0" style="border:none; overflow:hidden; width:80px; height:21px;" allowtransparency="true"></iframe></div>
<div style="float:left; margin:15px;"><a href="https://twitter.com/bloggertrix" class="twitter-follow-button" data-show-count="false" data-size="large" data-show-screen-name="false">Follow @hannygames</a>
<script>!function(d,s,id){var js,fjs=d.getElementsByTagName(s)[0];if(!d.getElementById(id)){js=d.createElement(s);js.id=id;js.src="//platform.twitter.com/widgets.js";fjs.parentNode.insertBefore(js,fjs);}}(document,"script","twitter-wjs");</script></div>
</div>
<div class='clear'></div>
10. Now save your template. You are done.

 Freind Sites
 Recent Posts
 Labels
 Blog Statistic

