
In order to keeping busy visitors on our blogs finally we got the plugin which we have been waiting from long time,recently facebook has launched their "Recommendation Bar" in beta version,the Recommendation Bar is a plugin which shows a number of some recommended articles for your readers or visitors and you can set number of recommended articles,when any visitor visits to your any post,after some specific time the plugin pop ups at the right/left corner of your blog with the recommended articles,thats why its helps you to keep busy your visitors on your blog.The plugin contains title of your post,thumbnail and number of likes just below of that post and the plugin shows the only those articles which are previously liked or shared on facebook.If you want more such plugins then I am listing some similar widgets and plugins -
- Related Posts Widget With Image Thumbnail For Blogger
- Related Posts Without Thumbnail For Blogger
- Simplereach's Recommended Slide Out Widget For Blogger
Now lets see how to add facebook recommendations bar to blogger?
How To Add Facebook Recommendations Bar To Blogger?
For better understanding I am dividing this post in two parts and they are as below,
- Creating new Facebook App
- Adding Facebook Recommendations Bar To Blogger
Part 1 : Creating new Facebook App
To create Facebook app for your Recommendation Bar follow below steps,
- First go to Facebook Apps and login with your Facebook account
- Click on Create New App button at top right corner

- As soon as you hit Create New App button a pop up box will appear.In App Name field fill Recommend Bar and keep all it is and hit Continue button.
 |
| Click On Image To Enlarge |
- Enter the captcha as shown in image and hit Submit button

- Now you will redirect to an another page.Scroll down and click on Website with Facebook Login tab and inside the box input your blog URL.Now leave all fields as it is and click Save Changes
 |
| Click On Image To Enlarge |
- Now copy your App ID and paste it into notepad,we will need it later.

Great,you have created your App.Now lets see how to add Recommendations Bar to blogger.
Part 2 : Adding Facebook Recommendations Bar To Blogger
- Go to Blogger Dashboard > Template
- Download a copy of your template
- Click on Edit HTML
- Hit Proceed button
- Now search for below code in your template
<htmlreplace it with below code,
<html xmlns:fb='http://ogp.me/ns/fb#'Now find for below code,
<body>just below of it paste following code,
Note - If you are using default blogger templates then search for <body tag instead of above code.
<div id='fb-root'/>
<script>
//Facebook Recommendation bar by http://www.helperblogger.com/
//this notice must stay intact for legal use
//For more visit http://www.helperblogger.com/
//<![CDATA[
(function(d, s, id) {
var js, fjs = d.getElementsByTagName(s)[0];
if (d.getElementById(id)) return;
js = d.createElement(s); js.id = id;
js.src = "//connect.facebook.net/en_US/all.js#xfbml=1&appId=YOUR APP ID HERE";
fjs.parentNode.insertBefore(js, fjs);
}(document, 'script', 'facebook-jssdk'));
//]]>
</script>
<b:if cond='data:blog.pageType == "item"'><b:if cond='data:blog.pageType != "static_page"'><div style='z-index:999999; position:absolute;'>
<fb:recommendations-bar action='like' max_age='0' num_recommendations='3' read_time='10' side='right' site='http://www.helperblogger.com/' trigger='40%'/></div>
</b:if></b:if>- Replace APP ID HERE with your APP ID which you have created in first part
- Replace http://www.helperblogger.com/ with your blog URL.
- The widget will only appear on post pages and not on homepage or static pages. To display it on all pages, then simply delete the lines in red color.
- If you want to change number of recommendations then simply change the value 3
- If you don't want to show your old articles then edit the value max_age='0',you can set it to 1-180.But if you don't want to take age into account then let it be 0 as default.
- If you want to change position of bar to right to left then simply replace right with left.
- When any visitor comes to your blog,after specific time the bar expand.I have set the time to 10 seconds to chnage it just change value 10.
Finally save your template and visit your post pages.
The installation of this plugin is longer but it is easy.If
are getting any problem then feel free to post it via comment form.I'll
glad to help you :)
Facebook timeline is a great way of displaying your
old photos, memorable posts and apps with your friends and family. This
feature changes your entire Facebook Profile layout into a more
attractive look. I previously wrote a tutorial on how to Enable Facebook Timeline Feature
and today I am sharing the tutorial on how to completely remove the
timeline app from your profile and revert to older Facebook profile
layout. Since this time-based story telling did receive mixed feedback
therefore it would be really helpful for most of you to learn how to
undo/delete this application.


UPDATE: Facebook Timeline has been officially activated on all old layouts. Know why you can't undo Facebook Timeline?
How To Disable Facebook Timeline Layout?
- Log in to your Facebook account
- Then visit this page Developers
- Towards your left you will see apps. Choose the app you created for timeline. In my case I named it Timeline Feature.
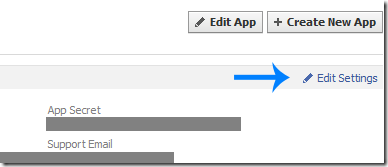
4. Click the Edit Settings link,
5. Then on the settings page towards bottom-left you will see many options under related links, Choose Delete App. Which will delete the timeline app.
6. Confirm to delete the app and Bingo you have successfully shifted back to the older Profile view.
Visit your profile to see it in its exact previous look and layout. Do
let me know if you needed any help pals. Hope you find this helpful.
:>

I will not be providing a DEMO for this because you can try it live in our HTML Editor to see how it works.
Tip: Copy the code given in step#4 and paste it inside this editor.
How it works?
This
popup appears only once to every new visitor. The ip address of the
visitor is stored in browser cookie and as the page loads again the
widget wont be called again for the same visitor thus eliminating the
chances of bugging regular readers. Because of course it will look weird
if the popup appears again and again on every pageview. It will appear
both on homepage and sub pages depending which page the visitor is
accessing. I have set the cookie refresh time to 30 days, which means
that this lightbox will appear again for the same visitor after 30 days.
We can easily set the number of days to prompt the visitors about your
Facebook Fan page. Lets get straight to the one step installation
process.
Add Facebook LikeBox inside Jquery Popup in Blogger
I am discussing here steps for blogger but if you know how to deal simple HTML code then you can easily add it to your wordpress blog too.- Go To Blogger > Design
- Click choose a gadget
- Select HTML/javascript widget
- Paste the following code inside it
<style>
/*
ColorBox Core Style:
The following CSS is consistent between example themes and should not be altered.
*/
#colorbox, #cboxOverlay, #cboxWrapper{position:absolute; top:0; left:0; z-index:9999; overflow:hidden;}
#cboxOverlay{position:fixed; width:100%; height:100%;}
#cboxMiddleLeft, #cboxBottomLeft{clear:left;}
#cboxContent{position:relative;}
#cboxLoadedContent{overflow:auto;}
#cboxTitle{margin:0;}
#cboxLoadingOverlay, #cboxLoadingGraphic{position:absolute; top:0; left:0; width:100%;}
#cboxPrevious, #cboxNext, #cboxClose, #cboxSlideshow{cursor:pointer;}
.cboxPhoto{float:left; margin:auto; border:0; display:block;}
.cboxIframe{width:100%; height:100%; display:block; border:0;}
/*
User Style:
Change the following styles to modify the appearance of ColorBox. They are
ordered & tabbed in a way that represents the nesting of the generated HTML.
*/
#cboxOverlay{background:#000;opacity:0.5 !important;}
#colorbox{
box-shadow:0 0 15px rgba(0,0,0,0.4);
-moz-box-shadow:0 0 15px rgba(0,0,0,0.4);
-webkit-box-shadow:0 0 15px rgba(0,0,0,0.4);
}
#cboxTopLeft{width:14px; height:14px; background:url(https://blogger.googleusercontent.com/img/b/R29vZ2xl/AVvXsEic67qGcFcOtLct1YXz2zNApOGWC-IbG9unH3kCiE2YtbZ4jVGgbHh2Q7CRhsbOTVFenDyzz3_w2Ew1Bso6-bN4Mwaqr46VbIJbwhfn8JvLu7QVhh9r98o1onTLpY5F4yi3cO3agYAxu2M/s1600/controls.png) no-repeat 0 0;}
#cboxTopCenter{height:14px; background:url(https://blogger.googleusercontent.com/img/b/R29vZ2xl/AVvXsEiVrGABozPxxCIMoHjV3kZSVnJRNgvlLWVpSKWT7lVRUCrIkHxoX-qFOCvvzg-jwaY2CbSG-boabrLfuk9PzvEUYJE8IAbNp9bVIuh4C_NSAo-ndxVm-3_anXoxOJem4yiglCEQ7unZIas/s400/border.png) repeat-x top left;}
#cboxTopRight{width:14px; height:14px; background:url(https://blogger.googleusercontent.com/img/b/R29vZ2xl/AVvXsEic67qGcFcOtLct1YXz2zNApOGWC-IbG9unH3kCiE2YtbZ4jVGgbHh2Q7CRhsbOTVFenDyzz3_w2Ew1Bso6-bN4Mwaqr46VbIJbwhfn8JvLu7QVhh9r98o1onTLpY5F4yi3cO3agYAxu2M/s1600/controls.png) no-repeat -36px 0;}
#cboxBottomLeft{width:14px; height:43px; background:url(https://blogger.googleusercontent.com/img/b/R29vZ2xl/AVvXsEic67qGcFcOtLct1YXz2zNApOGWC-IbG9unH3kCiE2YtbZ4jVGgbHh2Q7CRhsbOTVFenDyzz3_w2Ew1Bso6-bN4Mwaqr46VbIJbwhfn8JvLu7QVhh9r98o1onTLpY5F4yi3cO3agYAxu2M/s1600/controls.png) no-repeat 0 -32px;}
#cboxBottomCenter{height:43px; background:url(https://blogger.googleusercontent.com/img/b/R29vZ2xl/AVvXsEiVrGABozPxxCIMoHjV3kZSVnJRNgvlLWVpSKWT7lVRUCrIkHxoX-qFOCvvzg-jwaY2CbSG-boabrLfuk9PzvEUYJE8IAbNp9bVIuh4C_NSAo-ndxVm-3_anXoxOJem4yiglCEQ7unZIas/s400/border.png) repeat-x bottom left;}
#cboxBottomRight{width:14px; height:43px; background:url(https://blogger.googleusercontent.com/img/b/R29vZ2xl/AVvXsEic67qGcFcOtLct1YXz2zNApOGWC-IbG9unH3kCiE2YtbZ4jVGgbHh2Q7CRhsbOTVFenDyzz3_w2Ew1Bso6-bN4Mwaqr46VbIJbwhfn8JvLu7QVhh9r98o1onTLpY5F4yi3cO3agYAxu2M/s1600/controls.png) no-repeat -36px -32px;}
#cboxMiddleLeft{width:14px; background:url(https://blogger.googleusercontent.com/img/b/R29vZ2xl/AVvXsEic67qGcFcOtLct1YXz2zNApOGWC-IbG9unH3kCiE2YtbZ4jVGgbHh2Q7CRhsbOTVFenDyzz3_w2Ew1Bso6-bN4Mwaqr46VbIJbwhfn8JvLu7QVhh9r98o1onTLpY5F4yi3cO3agYAxu2M/s1600/controls.png) repeat-y -175px 0;}
#cboxMiddleRight{width:14px; background:url(https://blogger.googleusercontent.com/img/b/R29vZ2xl/AVvXsEic67qGcFcOtLct1YXz2zNApOGWC-IbG9unH3kCiE2YtbZ4jVGgbHh2Q7CRhsbOTVFenDyzz3_w2Ew1Bso6-bN4Mwaqr46VbIJbwhfn8JvLu7QVhh9r98o1onTLpY5F4yi3cO3agYAxu2M/s1600/controls.png) repeat-y -211px 0;}
#cboxContent{background:#fff; overflow:visible;}
#cboxLoadedContent{margin-bottom:5px;}
#cboxLoadingOverlay{background:url(https://blogger.googleusercontent.com/img/b/R29vZ2xl/AVvXsEjK_DCBpShXcYZtyjYn-rTi6GJ_vyzEkEOc-0WwAG00Tvly2t78gMIkKPRfalyO2uT3HlDBhmdXdx2RUmWl5Dk3Fg3Pxb2ACFXsTN4t5Vr0O6P5bR9SSdMeW8cVrcQERcUtMy6cgTtw7bM/s400/loadingbackground.png) no-repeat center center;}
#cboxLoadingGraphic{https://blogger.googleusercontent.com/img/b/R29vZ2xl/AVvXsEigPD0NBJFRnXptAMpa-WXUph9M_5sQqWVbPW7wR2Yc0GRSrQmHV1ilTycPclrkaQ-uGQfD_VobmxKR-w1GTlt6_9JHC-K2xUXPLb4JKAU0GiRvz6kKunu-xKJw1pjFNz1vyWboS3nHhXQ/s400/loading.gif) no-repeat center center;}
#cboxTitle{position:absolute; bottom:-25px; left:0; text-align:center; width:100%; font-weight:bold; color:#7C7C7C;}
#cboxCurrent{position:absolute; bottom:-25px; left:58px; font-weight:bold; color:#7C7C7C;}
#cboxPrevious, #cboxNext, #cboxClose, #cboxSlideshow{position:absolute; bottom:-29px; background:url(https://blogger.googleusercontent.com/img/b/R29vZ2xl/AVvXsEic67qGcFcOtLct1YXz2zNApOGWC-IbG9unH3kCiE2YtbZ4jVGgbHh2Q7CRhsbOTVFenDyzz3_w2Ew1Bso6-bN4Mwaqr46VbIJbwhfn8JvLu7QVhh9r98o1onTLpY5F4yi3cO3agYAxu2M/s1600/controls.png) no-repeat 0px 0px; width:23px; height:23px; text-indent:-9999px;}
#cboxPrevious{left:0px; background-position: -51px -25px;}
#cboxPrevious.hover{background-position:-51px 0px;}
#cboxNext{left:27px; background-position:-75px -25px;}
#cboxNext.hover{background-position:-75px 0px;}
#cboxClose{right:0; background-position:-100px -25px;}
#cboxClose.hover{background-position:-100px 0px;}
.cboxSlideshow_on #cboxSlideshow{background-position:-125px 0px; right:27px;}
.cboxSlideshow_on #cboxSlideshow.hover{background-position:-150px 0px;}
.cboxSlideshow_off #cboxSlideshow{background-position:-150px -25px; right:27px;}
.cboxSlideshow_off #cboxSlideshow.hover{background-position:-125px 0px;}
/*-----------------------------------------------------------------------------------*/
/* Facebook Likebox popup For Blogger
/*-----------------------------------------------------------------------------------*/
#subscribe {
font: 12px/1.2 Arial,Helvetica,san-serif; color:#666;
}
#subscribe a,
#subscribe a:hover,
#subscribe a:visited {
text-decoration:none;
}
.box-title {
color: #F66303;
font-size: 20px !important;
font-weight: bold;
margin: 10px 0;
border:1px solid #ddd;
-moz-border-radius:6px;
-webkit-border-radius:6px;
border-radius:6px;
box-shadow: 5px 5px 5px #CCCCCC;
padding:10px;
line-height:25px; font-family:arial !important;
}
.box-tagline {
color: #999;
margin: 0;
text-align: center;
}
#subs-container {
padding: 35px 0 30px 0;
position: relative;
}
a:link, a:visited {
border:none;
}
.demo {
display:none;
}
</style>
<script src='https://ajax.googleapis.com/ajax/libs/jquery/1.6.1/jquery.min.js'></script>
<script src="http://mybloggertricks.googlecode.com/files/jquery.colorbox-min.js"></script>
<script type="text/javascript">
jQuery(document).ready(function(){
if (document.cookie.indexOf('visited=true') == -1) {
var fifteenDays = 1000*60*60*24*30;
var expires = new Date((new Date()).valueOf() + fifteenDays);
document.cookie = "visited=true;expires=" + expires.toUTCString();
$.colorbox({width:"400px", inline:true, href:"#subscribe"});
}
});
</script>
<!-- This contains the hidden content for inline calls -->
<div style='display:none'>
<div id='subscribe' style='padding:10px; background:#fff;'>
<h3 class="box-title">Receive all updates via Facebook. Just Click the Like Button Below<center><p style="line-height:3px;" >▼</p></center></h3>
<center>
<iframe src="//www.facebook.com/plugins/likebox.php?href=http%3A%2F%2Fwww.facebook.com%2Fbloggertricks&width=300&colorscheme=light&show_faces=true&border_color=%23ffffff&stream=false&header=false&height=258" scrolling="no" frameborder="0" style="border:none; overflow:hidden; width:300px; height:258px;" allowtransparency="true"></iframe>
</center>
<p style=" float:right; margin-right:35px; font-size:9px;" >Powered By <a style=" font-size:9px; color:#3B78CD; text-decoration:none;" href="http://www.mybloggertricks.com">Blogger Widgets</a></p>
</div>
</div>
Make this simple change:
- Replace bloggertricks with your facebook username.
5. Hit the save button. Drag the widget to anywhere on your right sidebar.
6. Click the orange save button towards top right.
done! Visit your blogs to see it poping up just beautifully. To review the widget just delete your browser cookies and refresh the page to see it appearing again.
Want the widget to appear Repeatedly
If you want to prompt the likebox every time the visitor enters your blog then simply delete this *30 from the code above.Do let me know if you needed more help. Peace and blessings pals! :)

Live Preview
How to Install Facebook Popout Likebox Version 2 ?
First you need to have a jQuery Plugin in your Blog template.This Step is Required, If your Blog already have this plugin then Ignore this Step.
If your Blog Don’t have this Plugin, Install the jQuery Plugin.
Add the below line of code before
</head> tag.<script src="https://ajax.googleapis.com/ajax/libs/jquery/1.7.1/jquery.min.js"></script>- Click the Widget Generator Button
- Customize the Settings as you need
- Click on Generate button and add widget to your Blog
Some Instructions to Newbies
Likebox is for Facebook Pages. Some New Bloggers are using Their Profile Url and try to Installing the Facebook Likebox. But it gives Error!!.For Example, Way2Blogging’s FB page is http://facebook.com/way2blogging and you should see the Like Button in this Facebook Page.
where as in Facebook profile you should see the +1 Add Friend button.
That is the small Difference you can identify in the FB Page. Good Luck!

After initially feeling confused and complaining about Facebook's Timeline interface, I now must admit that I like the cover-photo design and am starting to get used to the two-column layout. But if you reject Facebook's latest overhaul and use Chrome, there's an extension that will return you to the old look.


TimeLINe in effect.

imelineRemove returns you to Facebook's old layout.
I wish all Chrome extensions worked as well as TimelineRemove. The extension installs quickly and gives you easy, two-click access to disabling Facebook's Timeline view.
After installing the extension, you'll see a button added to Chrome's toolbar. Click it, then toggle between enabling and disabling the Timeline view with the "Status: TimeLine Remove" link in the small window below the button. A green check-mark icon means the extension is disabling the Timeline view; a red X means the extension is not blocking Timeline. And if you want to hide the Timeline and keep it hidden, you can right-click on the button to hide it, leaving the extension running in the background.
Use the TimelineRemove button to hide and unhide the Timeline.
How to Disable Facebook Timeline
Step 1: Head to the Facebook Developers page where you originally created an app to enable Timeline. Click "Edit app."
 Step 2: The only way to remove Timeline is to delete the app. If you are an actual developer, you're out of luck. Otherwise, click "Delete app" in the left sidebar.
 (Credit: Screenshot by Sharon Vaknin/CNET)
 (Credit: Screenshot by Sharon Vaknin/CNET)
Once you confirm the app deletion, your Facebook Timeline will be disabled.
Step 1: Head to the Facebook Developers page where you originally created an app to enable Timeline. Click "Edit app."


Once you confirm the app deletion, your Facebook Timeline will be disabled.

 Freind Sites
 Recent Posts
 Labels
 Blog Statistic

